Logto は、モダンなアプリや SaaS 製品向けに設計された Auth0 の代替です。 Cloud と オープンソース の両方のサービスを提供し、アイデンティティと管理 (IAM) システムを迅速に立ち上げるのに役立ちます。認証 (Authentication)、認可 (Authorization)、マルチテナント管理を すべて一つに まとめて楽しんでください。
Logto Cloud で無料の開発テナントから始めることをお勧めします。これにより、すべての機能を簡単に探索できます。
この記事では、iOS (Swift) と Logto を使用して、GitHub (OAuth App) サインイン体験(ユーザー認証 (Authentication))を迅速に構築する手順を説明します。
前提条件
- 稼働中の Logto インスタンス。紹介ページ をチェックして始めてください。
- iOS (Swift) の基本的な知識。
- 使用可能な GitHub (OAuth App) アカウント。
Logto でアプリケーションを作成する
Logto は OpenID Connect (OIDC) 認証 (Authentication) と OAuth 2.0 認可 (Authorization) に基づいています。これは、複数のアプリケーション間でのフェデレーテッドアイデンティティ管理をサポートし、一般的にシングルサインオン (SSO) と呼ばれます。
あなたの Native app アプリケーションを作成するには、次の手順に従ってください:
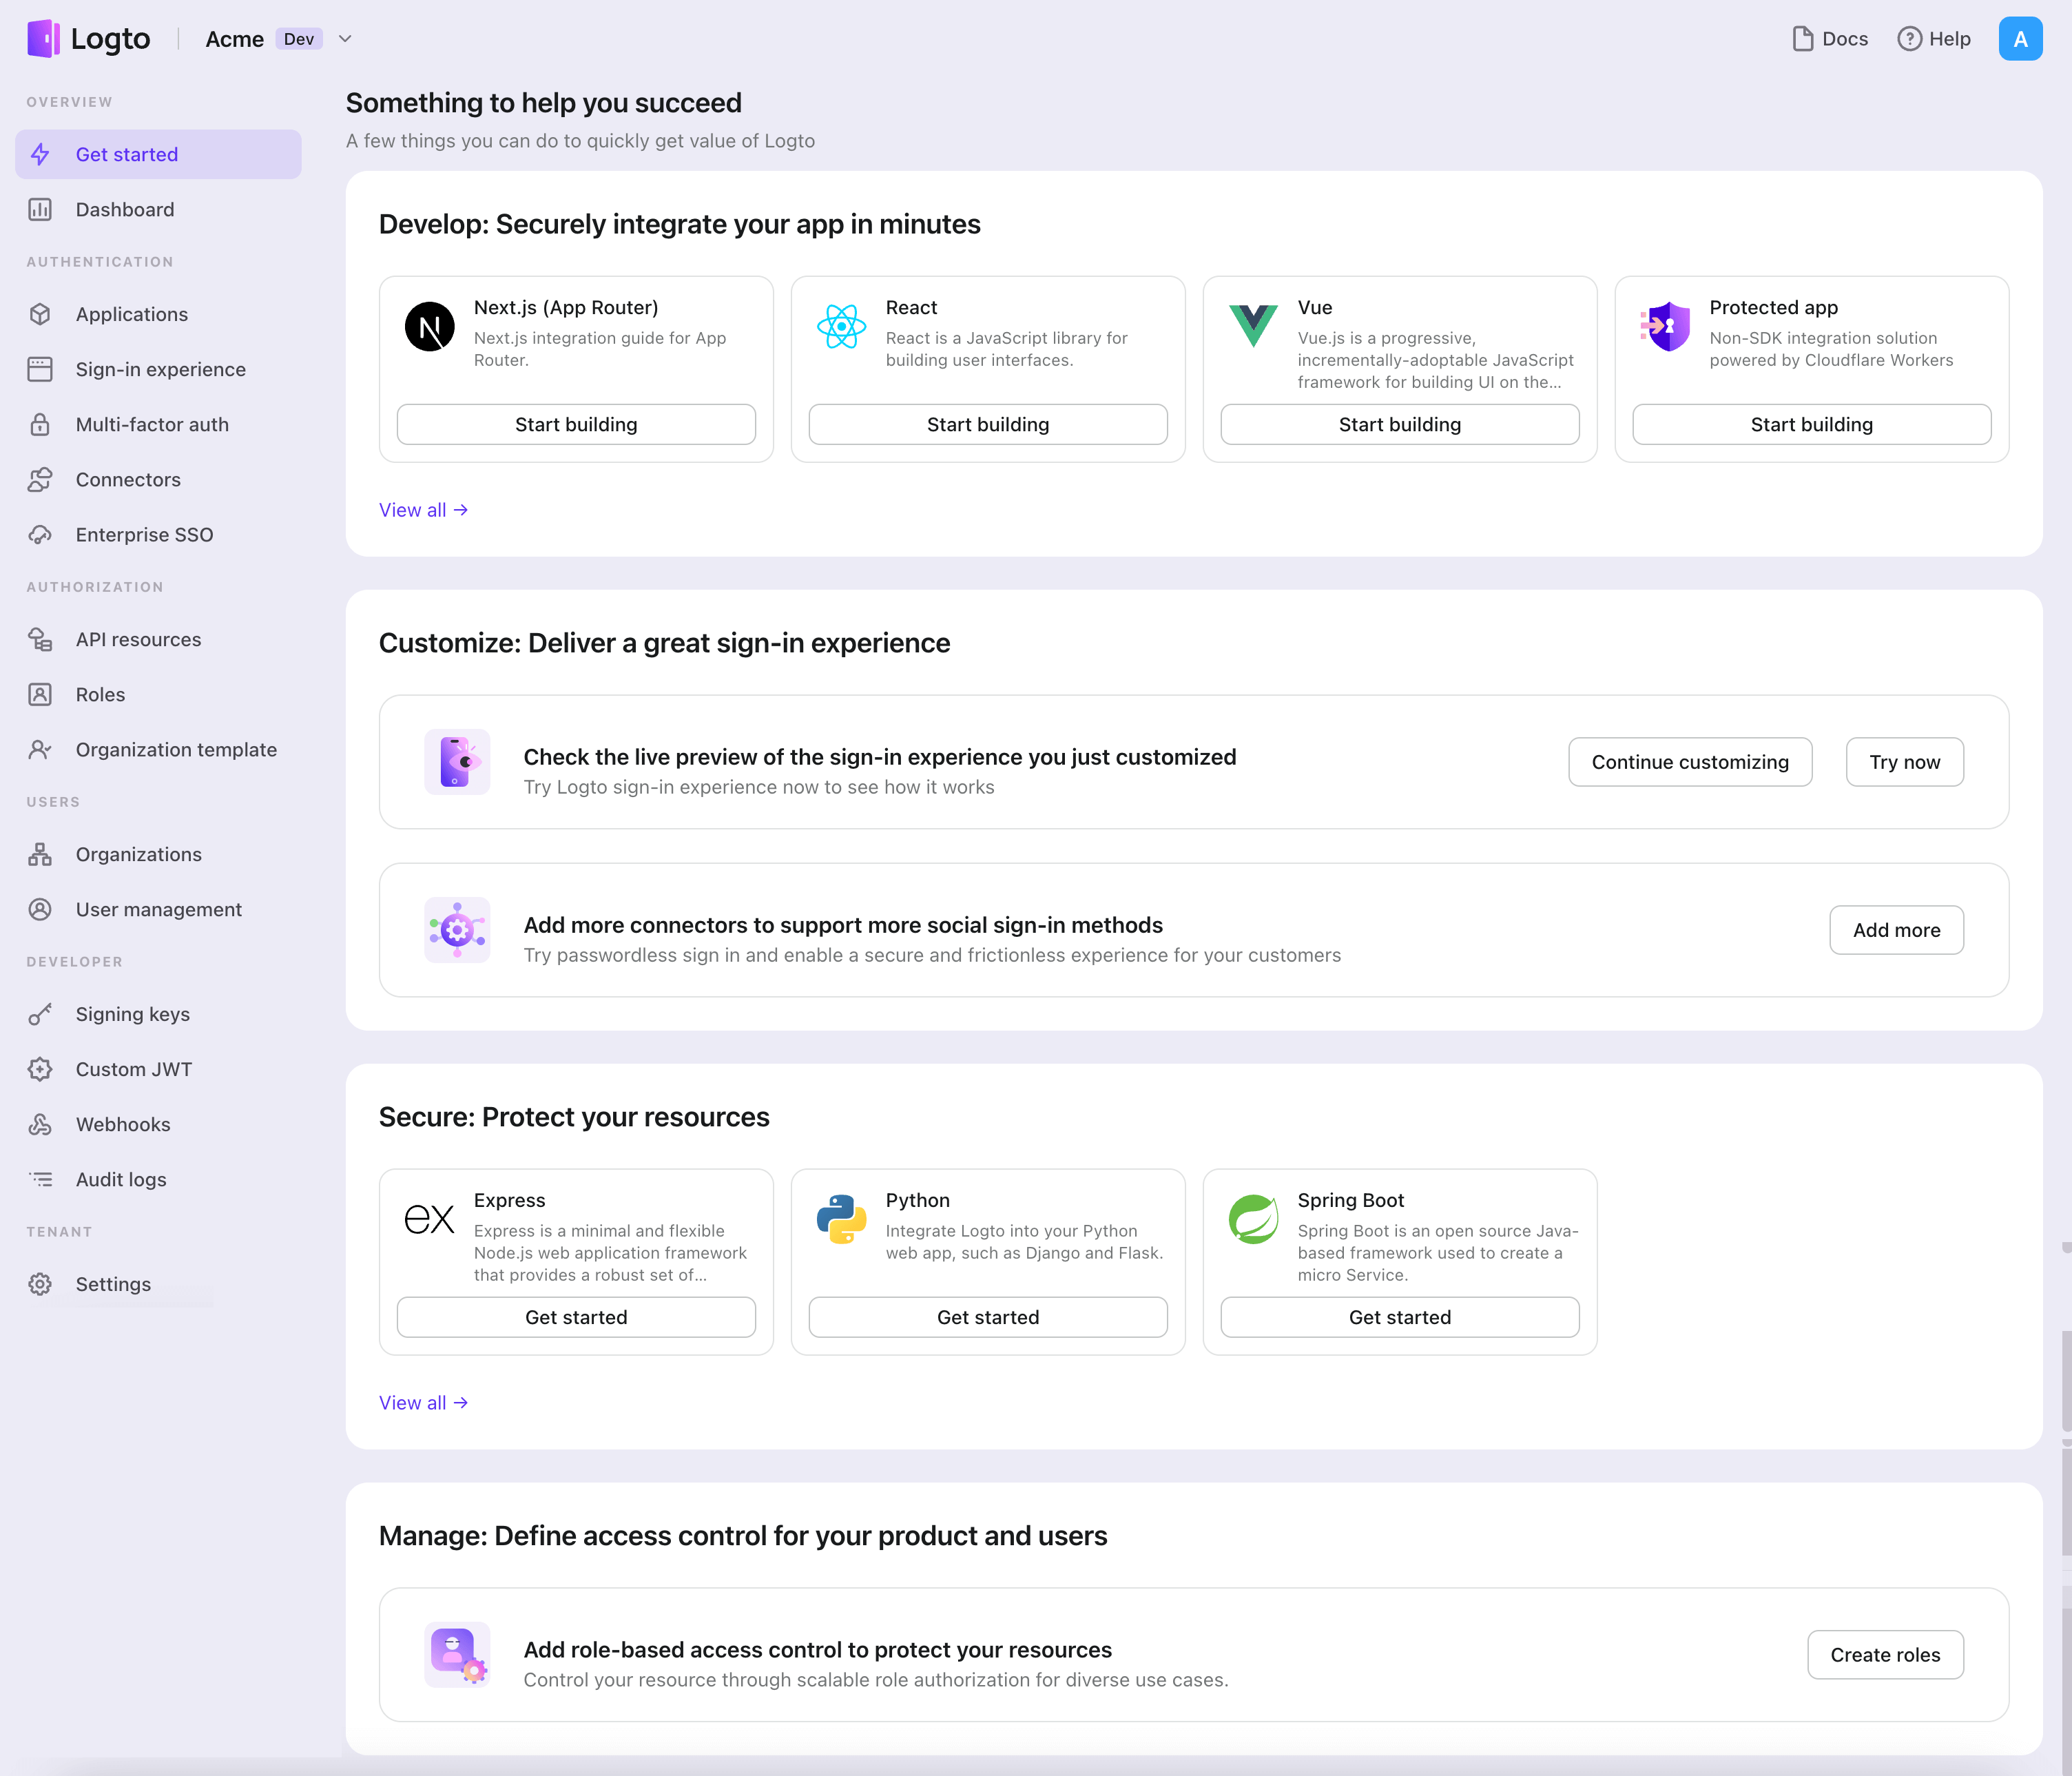
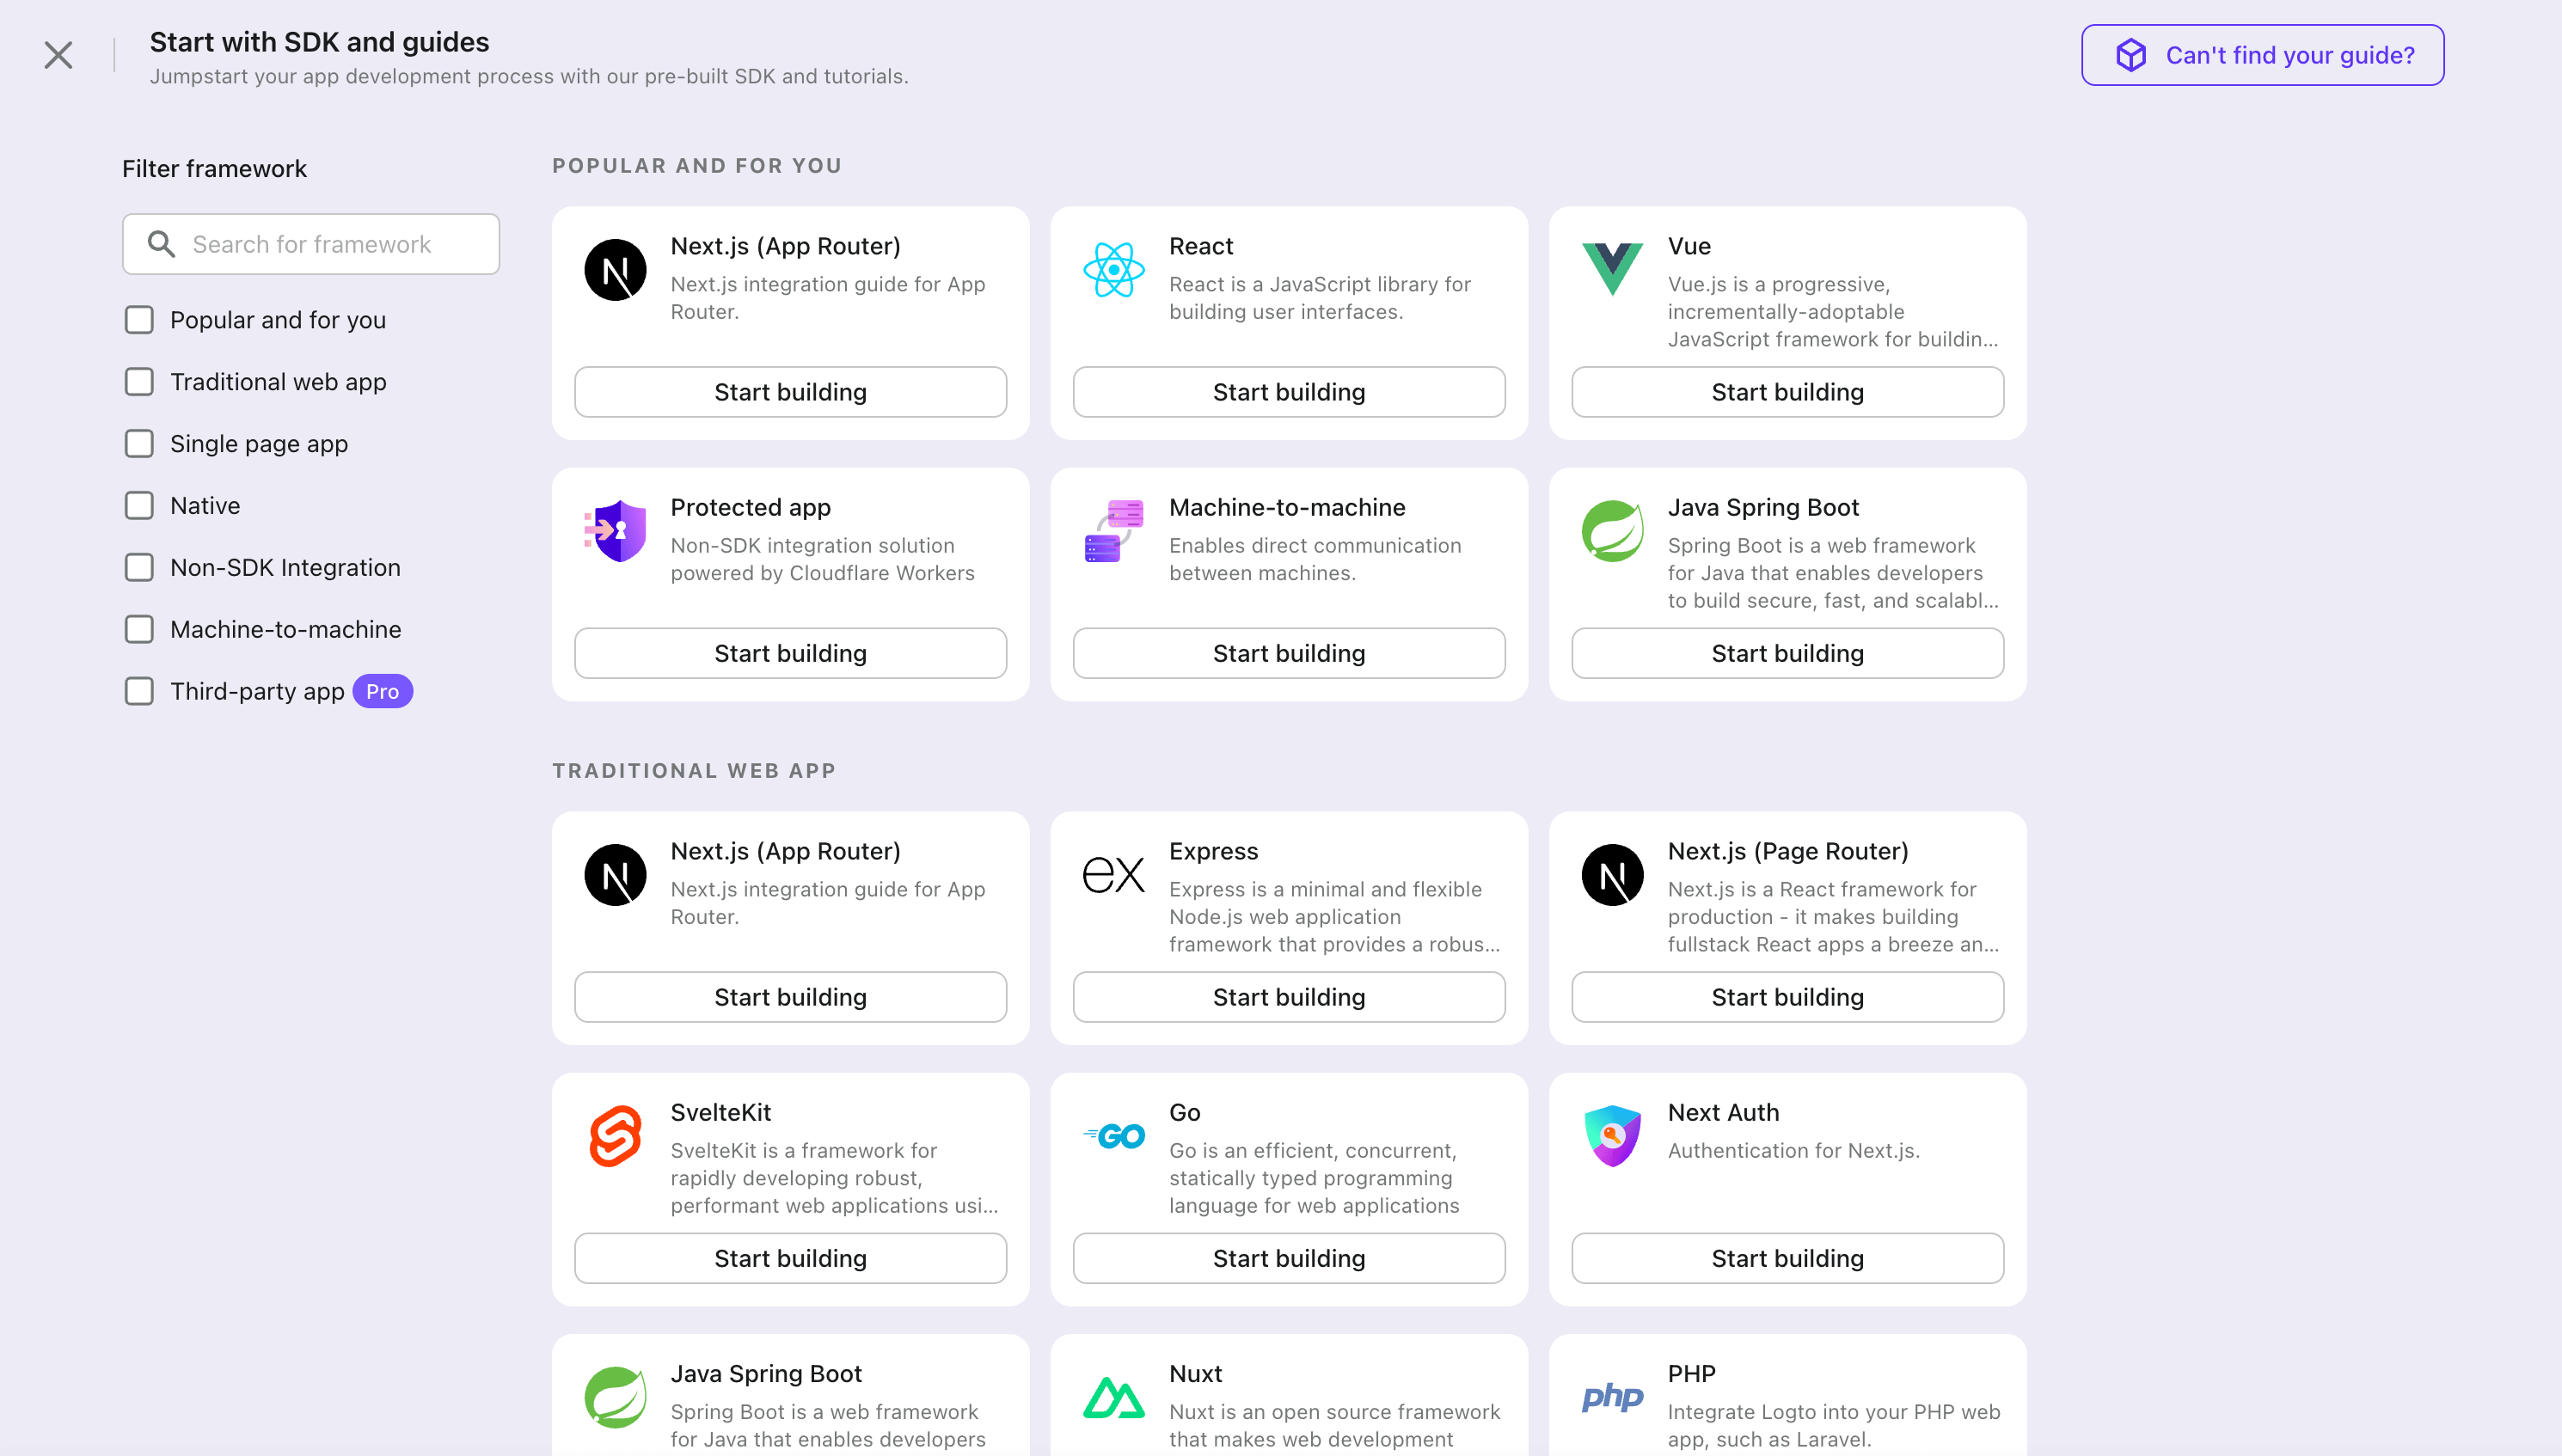
- Logto コンソール を開きます。「Get started」セクションで、「View all」リンクをクリックしてアプリケーションフレームワークのリストを開きます。あるいは、Logto Console > Applications に移動し、「Create application」ボタンをクリックします。
- 開いたモーダルで、左側のクイックフィルターチェックボックスを使用して、利用可能なすべての "Native app" フレームワークをフィルタリングするか、"Native app" セクションをクリックします。"iOS (Swift)" フレームワークカードをクリックして、アプリケーションの作成を開始します。
- アプリケーション名を入力します。例:「Bookstore」と入力し、「Create application」をクリックします。
🎉 タダーン!Logto で最初のアプリケーションを作成しました。詳細な統合ガイドを含むお祝いページが表示されます。ガイドに従って、アプリケーションでの体験を確認してください。
iOS (Swift) SDK を統合する
Logto SDK を依存関係として追加する
The minimum supported iOS version of Logto Swift SDK is iOS 13.
Logto Swift SDK comes in two major versions:
- v1: Opens the sign-in experience in an embedded WebView, which is required by the native social plugin targets, but does not support passkey sign-in (WebView does not support WebAuthn, the underlying standard of passkeys).
- v2 (beta): Opens the sign-in experience in
ASWebAuthenticationSession(the system browser), which unlocks passkey sign-in and shares the browser session. Note that v2 removes the native social plugin targets; social connectors still work through the browser. If you depend on the native WeChat or Alipay SDK handoff, stay on v1.
This guide covers both versions. Choose your version in the tabs below, and the choice will be kept in sync throughout this guide.
Use the following URL to add Logto SDK as a dependency in Swift Package Manager.
https://github.com/logto-io/swift.git
Since Xcode 11, you can directly import a Swift package w/o any additional tool.
When Xcode asks for the package version, choose the version you want to integrate:
- v2 (beta)
- v1
v2 is released as 2.0.0-beta.x prereleases until GA. Use 2.0.0-beta.1 or the latest 2.0.0-beta.x prerelease as the version. During beta, we recommend selecting the prerelease explicitly instead of relying on a normal version range to pick it automatically.
If you use Package.swift directly:
.package(url: "https://github.com/logto-io/swift.git", exact: "2.0.0-beta.1")
Use the latest v1 release as the stable line. The latest v1 version is 1.2.0.
If you use Package.swift directly:
.package(url: "https://github.com/logto-io/swift.git", from: "1.2.0")
We do not support Carthage and CocoaPods at the time due to some technical issues.
Carthage
Carthage needs a xcodeproj file to build. We will try to find a workaround later.
CocoaPods
CocoaPods does not support local dependency and monorepo, thus it's hard to create a .podspec for this repo.
LogtoClient を初期化する
LogtoConfig オブジェクトを使用して LogtoClient インスタンスを作成することで、クライアントを初期化します。
import Logto
import LogtoClient

let config = try? LogtoConfig(
  endpoint: "<your-logto-endpoint>", // 例: http://localhost:3001
  appId: "<your-app-id>"
)
let client = LogtoClient(useConfig: config)
デフォルトでは、ID トークンやリフレッシュ トークンのような資格情報を Keychain に保存します。したがって、ユーザーは戻ってきたときに再度サインインする必要はありません。
この動作をオフにするには、usingPersistStorage を false に設定します:
let config = try? LogtoConfig(
  // ...
  usingPersistStorage: false
)
サインイン
詳細に入る前に、エンドユーザー体験の概要を簡単にご紹介します。サインインプロセスは次のようにシンプルにまとめられます:
- アプリがサインインメソッドを呼び出します。
- ユーザーは Logto のサインインページにリダイレクトされます。ネイティブアプリの場合は、システムブラウザが開かれます。
- ユーザーがサインインし、アプリ(リダイレクト URI として設定)に戻されます。
リダイレクトベースのサインインについて
- この認証 (Authentication) プロセスは OpenID Connect (OIDC) プロトコルに従い、Logto はユーザーのサインインを保護するために厳格なセキュリティ対策を講じています。
- 複数のアプリがある場合、同じアイデンティティプロバイダー (Logto) を使用できます。ユーザーがあるアプリにサインインすると、Logto は別のアプリにアクセスした際に自動的にサインインプロセスを完了します。
リダイレクトベースのサインインの理論と利点について詳しく知るには、Logto サインイン体験の説明を参照してください。
Configure redirect URI
- v2 (beta)
- v1
Logto コンソールのアプリケーション詳細ページに切り替えましょう。リダイレクト URI io.logto.app://callback を追加し、「変更を保存」をクリックします。

In v2, the sign-in experience opens in ASWebAuthenticationSession (the system browser), and the redirect is routed back to your app through OS-level callback matching. For a custom scheme redirect URI such as io.logto.app://callback, register only the scheme part (io.logto.app) in your app's Info.plist, then add the full redirect URI to your Logto application's Redirect URIs.
In Xcode, open your app target, select Info, expand URL Types, and add one entry with io.logto.app in URL Schemes. If you edit Info.plist directly, add:
<key>CFBundleURLTypes</key>
<array>
  <dict>
    <key>CFBundleTypeRole</key>
    <string>Editor</string>
    <key>CFBundleURLName</key>
    <string>io.logto.app</string>
    <key>CFBundleURLSchemes</key>
    <array>
      <string>io.logto.app</string>
    </array>
  </dict>
</array>
For the browser flow in v2, you do not need to call LogtoClient.handle(url:); that plugin handoff API was removed with the embedded WebView flow.
Use Universal Links instead of a custom scheme?
You can also use an HTTPS redirect URI such as https://example.com/callback:
- Add the Associated Domains capability to your app.
- Configure
webcredentials:example.comsoASWebAuthenticationSessioncan match HTTPS callbacks on iOS 17.4 and newer. - If the same URL should also open your app as a Universal Link outside the authentication session, configure
applinks:example.comand host a validapple-app-site-associationfile for the domain and path. - Add the HTTPS URI to your Logto application's Redirect URIs.
- Pass the same URI to
signInWithBrowser.
On iOS 17.4 and newer, the SDK uses ASWebAuthenticationSession's HTTPS callback matching API so HTTPS redirects can automatically complete and dismiss the session. On older iOS versions, the authorization request can still use the HTTPS redirect URI, but the session may not close automatically unless your app handles the Universal Link callback itself. Keep a custom scheme redirect as a compatibility option if you need automatic completion on older iOS versions.
Logto コンソールのアプリケーション詳細ページに切り替えましょう。リダイレクト URI io.logto://callback を追加し、「変更を保存」をクリックします。
The Redirect URI in iOS SDK is only for internal use. There's NO NEED to add a Custom URL Scheme until a connector asks.
Sign-in and sign-out
.signInWithBrowser(redirectUri:) を呼び出す前に、Admin Console でリダイレクト URI
が正しく設定されていることを確認してください。 :::
- v2 (beta)
- v1
In v2, client.signOut(postLogoutRedirectUri:) performs a complete sign-out: it clears the local credentials, revokes the refresh token, and ends the Logto session by opening the end session endpoint in the system browser. The browser then navigates back to your app through the post sign-out redirect URI. Before using it, switch to the application details page of Logto Console, add the post sign-out redirect URI io.logto.app://signed-out and click "Save changes". The post sign-out redirect URI can use the same custom scheme you registered for sign-in.
For example, in a SwiftUI app:
struct ContentView: View {
  @State var isAuthenticated: Bool

  private let redirectUri = "io.logto.app://callback"
  private let postLogoutRedirectUri = "io.logto.app://signed-out"

  init() {
    isAuthenticated = client.isAuthenticated
  }

  var body: some View {
    VStack {
      if isAuthenticated {
        Button("Sign Out") {
          Task { [self] in
            let error = await client.signOut(postLogoutRedirectUri: postLogoutRedirectUri)
            if let error = error {
              print(error)
              return
            }
            isAuthenticated = false
          }
        }
      } else {
        Button("Sign In") {
          Task { [self] in
            do {
              try await client.signInWithBrowser(redirectUri: redirectUri)
              isAuthenticated = true
            } catch let error as LogtoClientErrors.SignIn {
              // error occurred during sign in
            } catch {
              // other errors
            }
          }
        }
      }
    }
  }
}
- You can also call
client.signOut()without a post sign-out redirect URI. No Console configuration is needed in this case: the browser shows the Logto sign-out page, and the user returns to the app by dismissing it manually. - If no UI context is available, you can call
client.clearCredentials()to clear the local credentials and revoke the refresh token. Note that this keeps the Logto session in the browser, so the nextsignInWithBrowsermay silently sign the user back in through that session.
You can use client.signInWithBrowser(redirectUri:) to sign in the user and client.signOut() to sign out the user.
For example, in a SwiftUI app:
struct ContentView: View {
  @State var isAuthenticated: Bool

  init() {
    isAuthenticated = client.isAuthenticated
  }

  var body: some View {
    VStack {
      if isAuthenticated {
        Button("Sign Out") {
          Task { [self] in
            await client.signOut()
            isAuthenticated = false
          }
        }
      } else {
        Button("Sign In") {
          Task { [self] in
            do {
              try await client.signInWithBrowser(redirectUri: "io.logto://callback")
              isAuthenticated = true
            } catch let error as LogtoClientErrors.SignIn {
              // error occurred during sign in
            } catch {
              // other errors
            }
          }
        }
      }
    }
  }
}
チェックポイント: アプリケーションをテストする
これで、アプリケーションをテストできます:
- アプリケーションを実行すると、サインインボタンが表示されます。
- サインインボタンをクリックすると、SDK がサインインプロセスを初期化し、Logto のサインインページにリダイレクトされます。
- サインインすると、アプリケーションに戻り、サインアウトボタンが表示されます。
- サインアウトボタンをクリックして、トークンストレージをクリアし、サインアウトします。
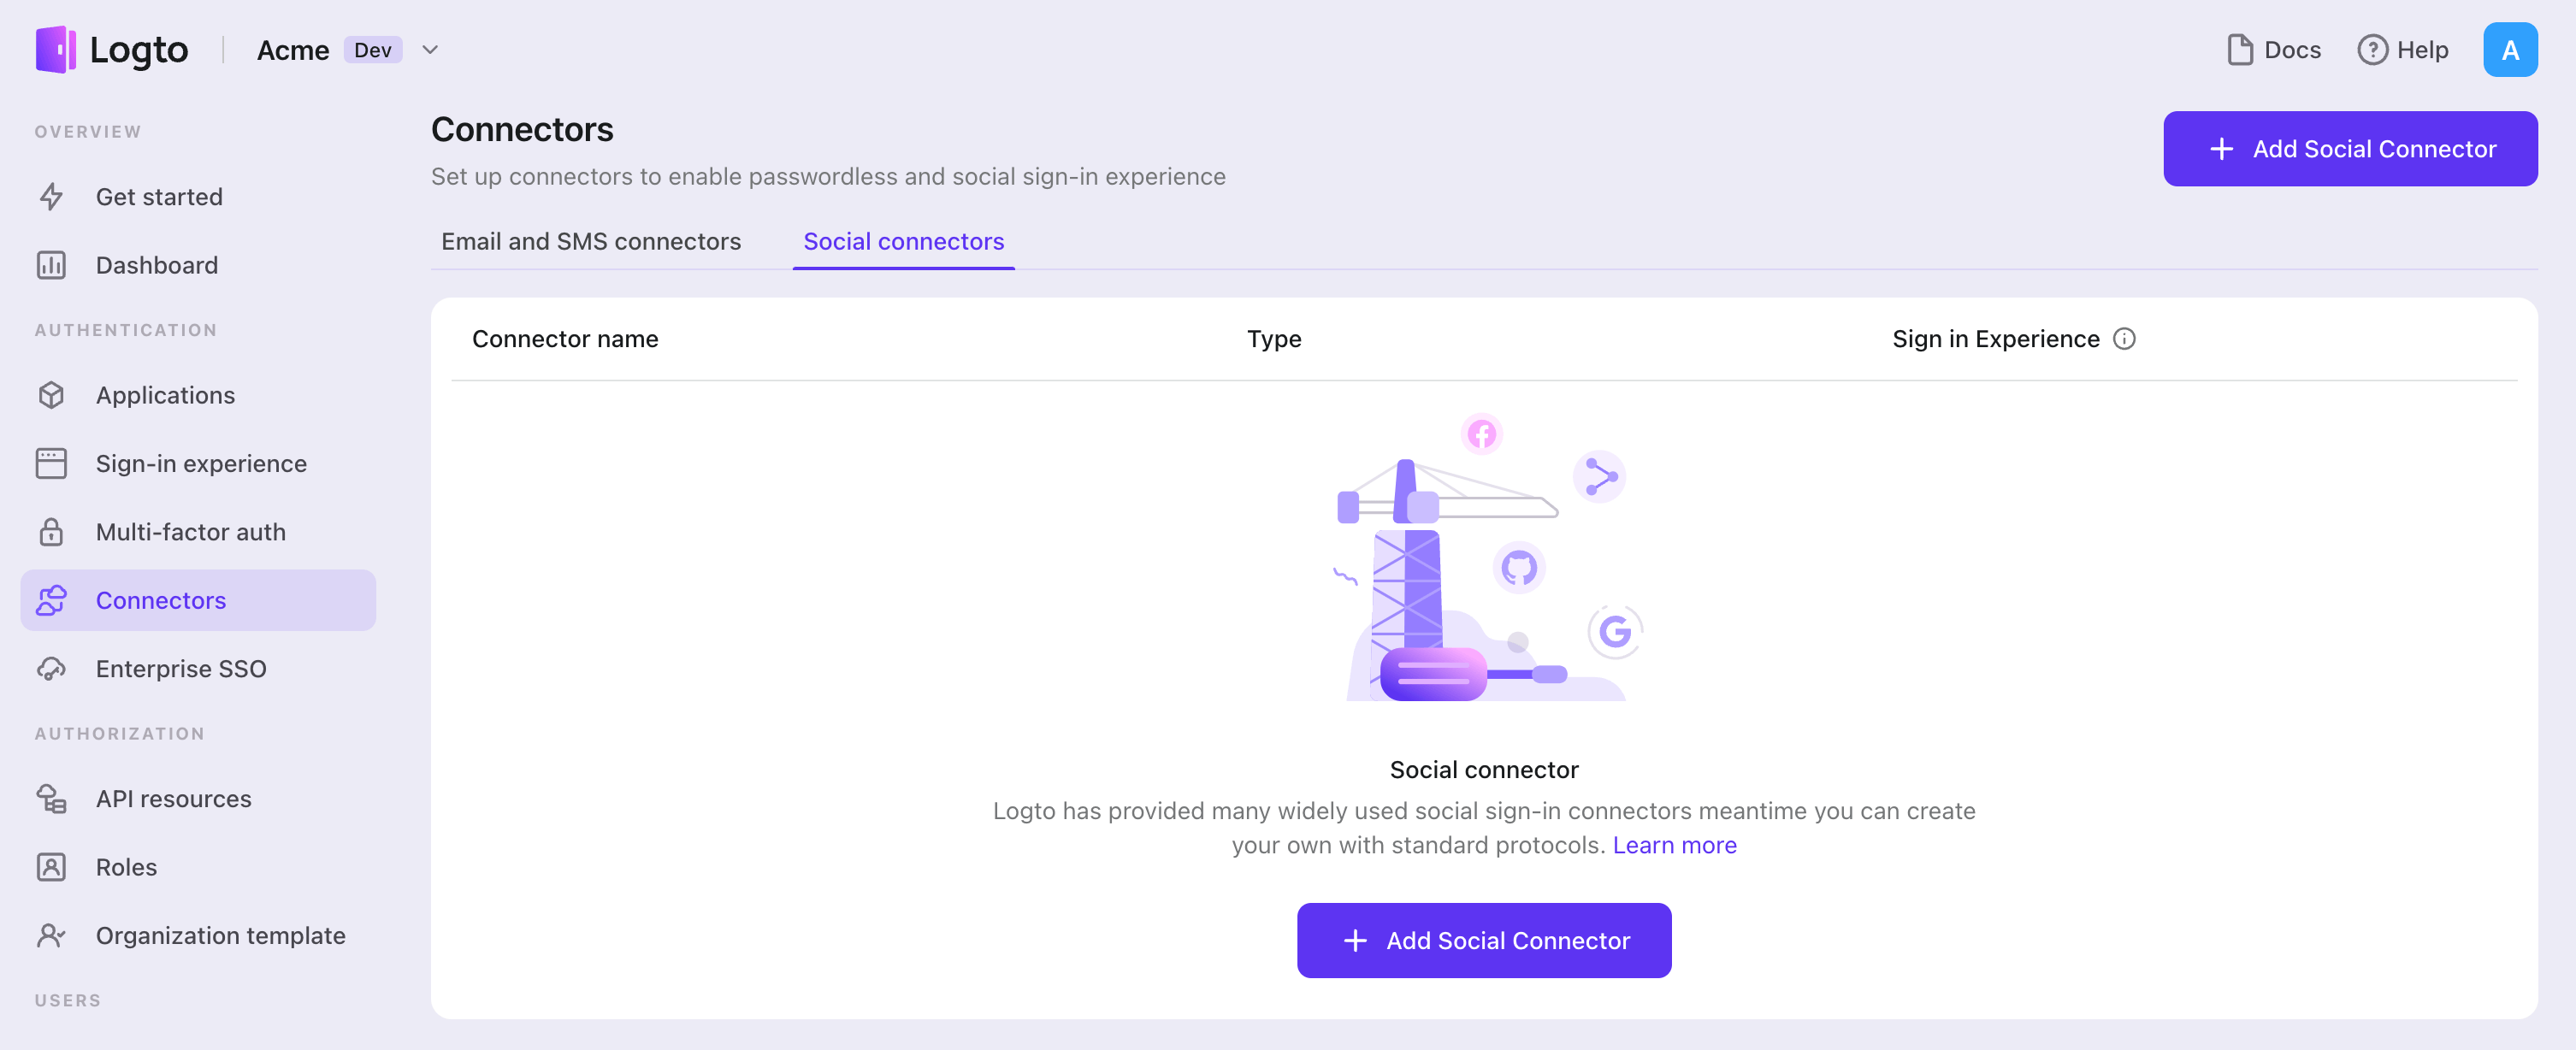
GitHub (OAuth App) コネクターを追加する
迅速なサインインを有効にし、ユーザーコンバージョンを向上させるために、アイデンティティプロバイダー (IdP) として iOS (Swift) を接続します。Logto ソーシャルコネクターは、いくつかのパラメーター入力を許可することで、この接続を数分で確立するのに役立ちます。
ソーシャルコネクターを追加するには、次の手順に従ってください:
- Console > Connectors > Social Connectors に移動します。
- 「Add social connector」をクリックし、「GitHub (OAuth App)」を選択します。
- README ガイドに従い、必要なフィールドを完了し、設定をカスタマイズします。
インプレースコネクターガイドに従っている場合は、次のセクションをスキップできます。
GitHub OAuth App を設定する
ステップ 1: GitHub で OAuth アプリを作成する
GitHub を認証 (Authentication) プロバイダーとして利用する前に、GitHub で OAuth アプリを作成し、OAuth 2.0 の認証情報を取得する必要があります。
- GitHub にアクセスし、アカウントでサインインします。必要に応じて新しいアカウントを作成してください。
- 設定 > 開発者設定 > OAuth apps に移動します。
- New OAuth App をクリックして新しいアプリケーションを登録します:
- Application name:アプリの説明的な名前を入力します。
- Homepage URL:アプリケーションのホームページ URL を入力します。
- Authorization callback URL:Logto の GitHub コネクターから Callback URI をコピーし、ここに貼り付けます。ユーザーが GitHub でサインインした後、ここにリダイレクトされ、Logto が認証 (Authentication) を完了するための認可コードが渡されます。
- Application description:(任意)アプリの簡単な説明を追加します。
- Register application をクリックして OAuth アプリを作成します。
Enable Device Flow のチェックボックスはオフのままにすることを推奨します。なぜなら、GitHub でサインインするユーザーがモバイルデバイスを利用する場合、GitHub モバイルアプリで初回サインイン操作を確認する必要があるためです。多くの GitHub ユーザーは GitHub モバイルアプリをインストールしていないため、サインインフローが妨げられる可能性があります。エンドユーザーが GitHub モバイルアプリでサインインフローを確認することを想定している場合のみ有効にしてください。デバイスフロー の詳細を参照してください。
GitHub OAuth アプリのセットアップ詳細については Creating an OAuth App をご覧ください。
ステップ 2: Logto コネクターを設定する
GitHub で OAuth アプリを作成した後、詳細ページにリダイレクトされ、Client ID をコピーしたり、Client secret を生成できます。
- GitHub OAuth アプリから Client ID をコピーし、Logto の
clientIdフィールドに貼り付けます。 - GitHub で Generate a new client secret をクリックして新しいシークレットを作成し、それをコピーして Logto の
clientSecretフィールドに貼り付けます。 - Logto で Save and Done をクリックし、アイデンティティシステムと GitHub を接続します。
Client secret は安全に保管し、クライアントサイドのコードで絶対に公開しないでください。GitHub の client secret は紛失した場合、復元できません。新しいものを生成する必要があります。
ステップ 3: スコープを設定する(任意)
スコープは、アプリがユーザーから要求する権限を定義し、GitHub アカウントからどのデータにアクセスできるかを制御します。
Logto の Scopes フィールドを使って、GitHub から追加の権限をリクエストできます。ニーズに応じて次のいずれかの方法を選択してください:
オプション 1: 追加の API スコープが不要な場合
- Logto の GitHub コネクターの
Scopesフィールドを空欄のままにします。 - デフォルトのスコープ
read:userがリクエストされ、Logto が基本的なユーザー情報(メール、名前、アバターなど)を正しく取得できるようになります。
オプション 2: サインイン時に追加スコープをリクエストする
- GitHub OAuth アプリ用の全スコープ一覧 を参照し、アプリに必要なスコープのみ追加します。
- 必要なスコープをすべて Scopes フィールドにスペース区切りで入力します。
- ここに記載したスコープはデフォルトを上書きするため、必ず認証 (Authentication) 用スコープ
read:userを含めてください。 - よく使われる追加スコープ例:
repo:プライベートリポジトリの完全な制御public_repo:パブリックリポジトリへのアクセスuser:email:ユーザーのメールアドレスへのアクセスnotifications:通知へのアクセス
- すべてのスコープが正しく有効であることを確認してください。誤ったスコープやサポートされていないスコープを指定すると、GitHub から「Invalid scope」エラーが返されます。
オプション 3: 後からインクリメンタルスコープをリクエストする
- ユーザーがサインインした後、必要に応じてフェデレーテッドソーシャル認可フローを再実行し、ユーザーの保存済みトークンセットを更新することで追加スコープをリクエストできます。
- これらの追加スコープは Logto の GitHub コネクターの
Scopesフィールドに記載する必要はなく、Logto の Social Verification API を通じて実現できます。
これらの手順に従うことで、Logto の GitHub コネクターはアプリに必要な権限のみをリクエストします。
アプリがこれらのスコープを使って GitHub API にアクセスし操作を行う場合は、Logto GitHub コネクターで Store tokens for persistent API access を有効にしてください。詳細は次のセクションを参照してください。
ステップ 4: 一般設定
GitHub への接続を妨げることはありませんが、エンドユーザーの認証 (Authentication) 体験に影響する一般的な設定をいくつか紹介します。
プロフィール情報の同期
GitHub コネクターでは、ユーザー名やアバターなどのプロフィール情報の同期ポリシーを設定できます。次のいずれかを選択してください:
- サインアップ時のみ同期:ユーザーが初めてサインインしたときにプロフィール情報を取得します。
- サインイン時に常に同期:ユーザーがサインインするたびにプロフィール情報を更新します。
GitHub API へのアクセス用トークンの保存(任意)
ユーザーの認可で GitHub API にアクセスし操作を行いたい場合(ソーシャルサインインやアカウント連携経由)、Logto は特定の API スコープを取得し、トークンを保存する必要があります。
- 上記の手順に従って必要なスコープを追加します。
- Logto GitHub コネクターで Store tokens for persistent API access を有効にします。Logto は GitHub のアクセストークンを Secret Vault に安全に保存します。
このチュートリアルで説明しているように GitHub OAuth アプリ を利用する場合、GitHub からリフレッシュトークン (Refresh token) を取得することはできません。なぜなら、アクセストークンはユーザーが手動で取り消さない限り有効期限がないためです。そのため、Scopes フィールドに offline_access を追加する必要はありません。追加するとエラーになる場合があります。
アクセストークンに有効期限を設けたい場合やリフレッシュトークン (Refresh token) を利用したい場合は、代わりに GitHub App との連携を検討してください。GitHub Apps と OAuth Apps の違い をご覧ください。
ステップ 5: 統合のテスト(任意)
本番運用前に、GitHub 連携をテストしましょう:
- Logto の開発テナントでコネクターを利用します。
- ユーザーが GitHub でサインインできることを確認します。
- 正しいスコープがリクエストされているか確認します。
- トークンを保存している場合は API コールもテストします。
GitHub OAuth アプリは、どの GitHub ユーザーアカウントでもすぐに動作します。他のプラットフォームのようにテストユーザーやアプリ承認は不要です。
設定を保存する
Logto コネクター設定エリアで必要な値をすべて記入したことを確認してください。「保存して完了」または「変更を保存」をクリックすると、GitHub (OAuth App) コネクターが利用可能になります。
サインイン体験で GitHub (OAuth App) コネクターを有効にする
ソーシャルコネクターを正常に作成したら、サインイン体験で「GitHub (OAuth App) で続行」ボタンとして有効にすることができます。
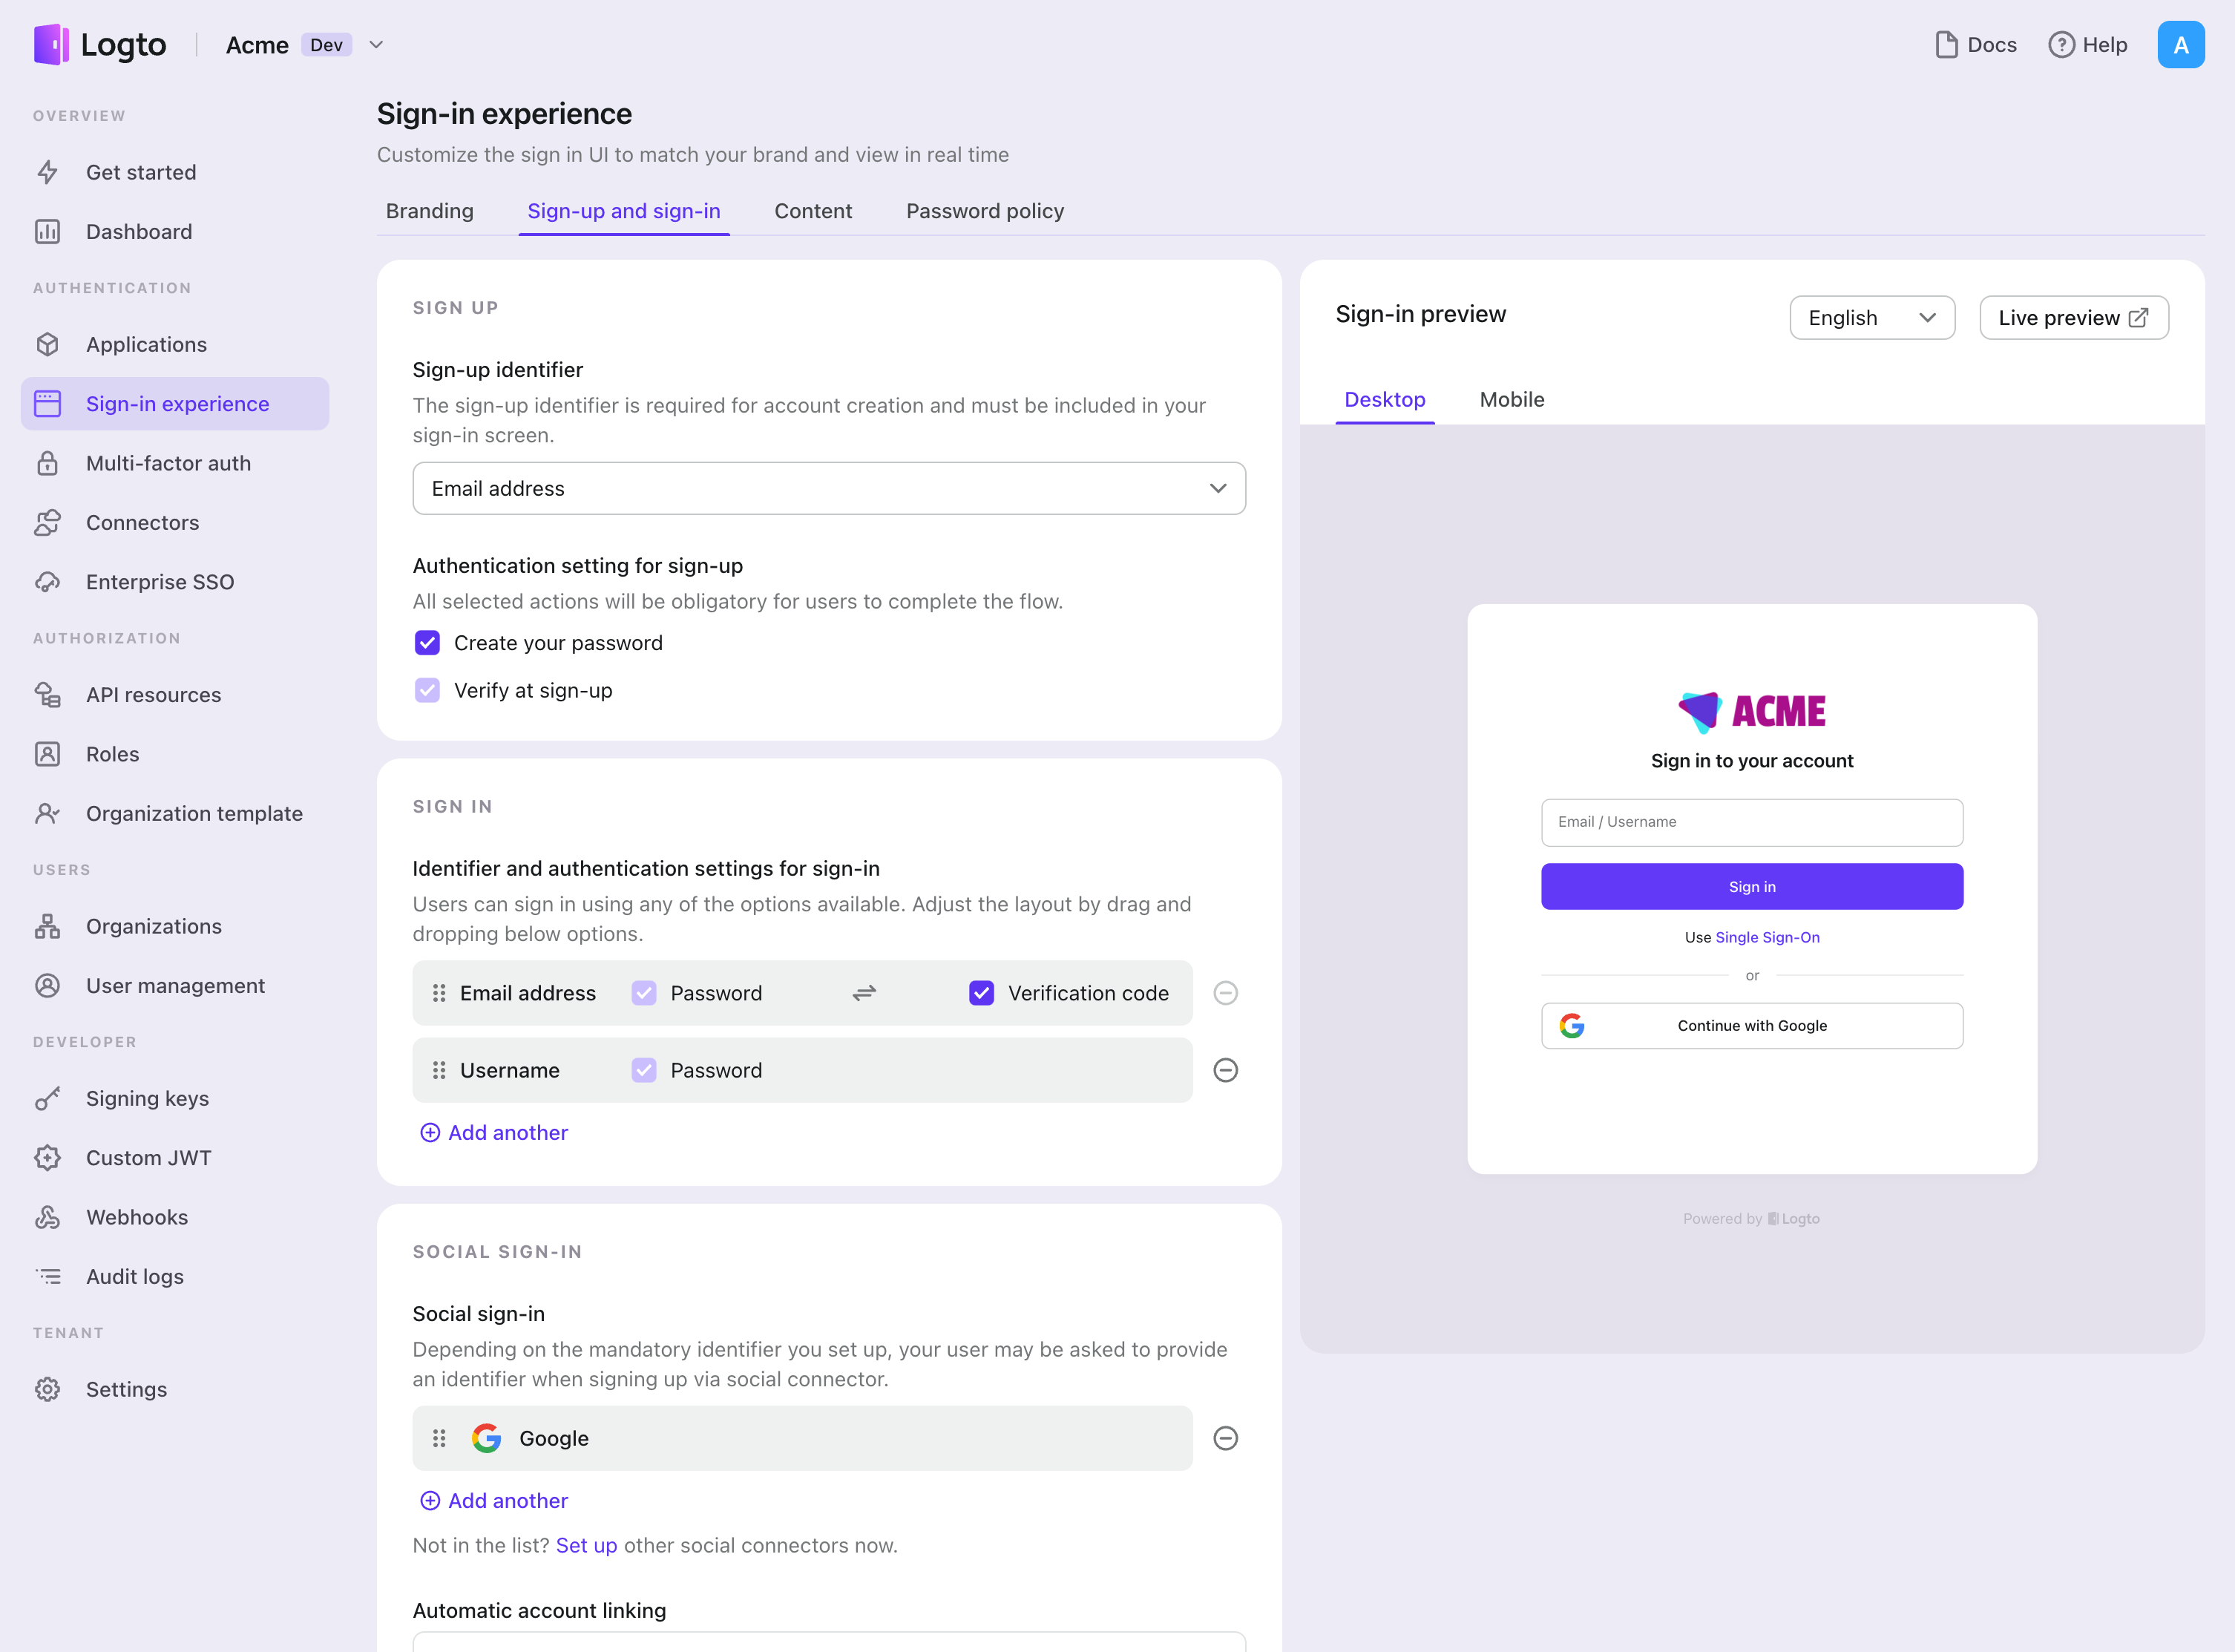
- Console > サインイン体験 > サインアップとサインイン に移動します。
- (オプション)ソーシャルログインのみが必要な場合は、サインアップ識別子に「該当なし」を選択します。
- 設定済みの GitHub (OAuth App) コネクターを「ソーシャルサインイン」セクションに追加します。
テストと検証
iOS (Swift) アプリに戻ります。これで GitHub (OAuth App) を使用してサインインできるはずです。お楽しみください!
さらなる読み物
エンドユーザーフロー:Logto は、MFA やエンタープライズシングルサインオン (SSO) を含む即時使用可能な認証 (Authentication) フローを提供し、アカウント設定、セキュリティ検証、マルチテナント体験の柔軟な実装のための強力な API を備えています。
認可 (Authorization):認可 (Authorization) は、ユーザーが認証 (Authentication) された後に行えるアクションやアクセスできるリソースを定義します。ネイティブおよびシングルページアプリケーションの API を保護し、ロールベースのアクセス制御 (RBAC) を実装する方法を探ります。
組織 (Organizations):特にマルチテナント SaaS や B2B アプリで効果的な組織機能は、テナントの作成、メンバー管理、組織レベルの RBAC、およびジャストインタイムプロビジョニングを可能にします。
顧客 IAM シリーズ:顧客(または消費者)アイデンティティとアクセス管理に関する連続ブログ投稿で、101 から高度なトピックまでを網羅しています。